
Adding a Share Hotspot Router to Help Connect to Qi Aerista
Sometimes special settings in public or office Wi-Fi networks make it difficult to connect your Qi Aerista with your app. And it is not possible to obtain access rights to alter the settings (see this blog) or add a piggyback router (see this blog) to facilitate the connection.
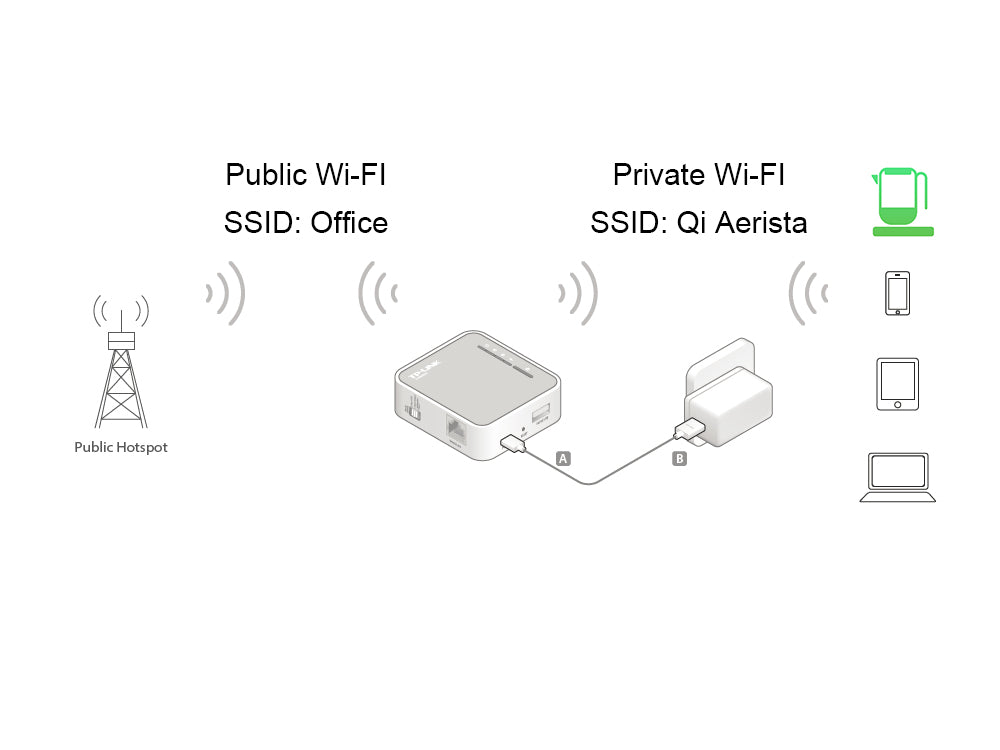
Therefore you may want to consider adding a share hotspot (or WISP client) router to do the trick. Essentially you would create a separate private W-Fi network with specific settings to connect to your brewer and smartphone on one end, and the public/office Wi-Fi on the other. Your smartphone can connect to either one after the connection is successful.

Our recommended choice for the share hotspot router is the TP-Link WR802N or WR902AC router based on its simplicity, small form factor and affordability. Besides this model, feel free to test with other available router models that work.
Setup Procedures
1. Power up the shared hotspot router.
2. Set the hotspot router to Share Hotspot or WISP Client Router Mode.
3. In the appropriate setup page, enter the public Wi-Fi SSID and password.

4. In the appropriate setup page, enter the private Wi-Fi SSID and password.

5. Make sure the private network has the following settings:
- Separate SSIDs for 2.4GHz & 5GHz communication channels
- WPA2 security
- AP isolation disabled
- Supports IEEE 802.11 b/g only
6. Once the private network has been set up, connect your smartphone and your brewer to it by following the connection procedure in the user guide.
7. Once the brewer connection has been set up, you should be able to connect to it even if your smartphone is connected to the public network.